
Disk support will be activated if the selected XML file includes a disk defintion (ide: IDE GUI, tu58: TU58 GUI, wd1770/wd1793: FDC GUI, upd765: FDC or HD GUI)
Depending on the configuration 1 to 4 drives (0 to 3) can be defined. In the example above a COMX is configured with 2 WD1770 drives. To change a disk at run time select a different filename by using one of the FDC x buttons (highlighted in blue) or type a name in the text field (highlighted in orange). To eject the disk use the eject button (highlighted in yellow) or remove the filename in the text field.
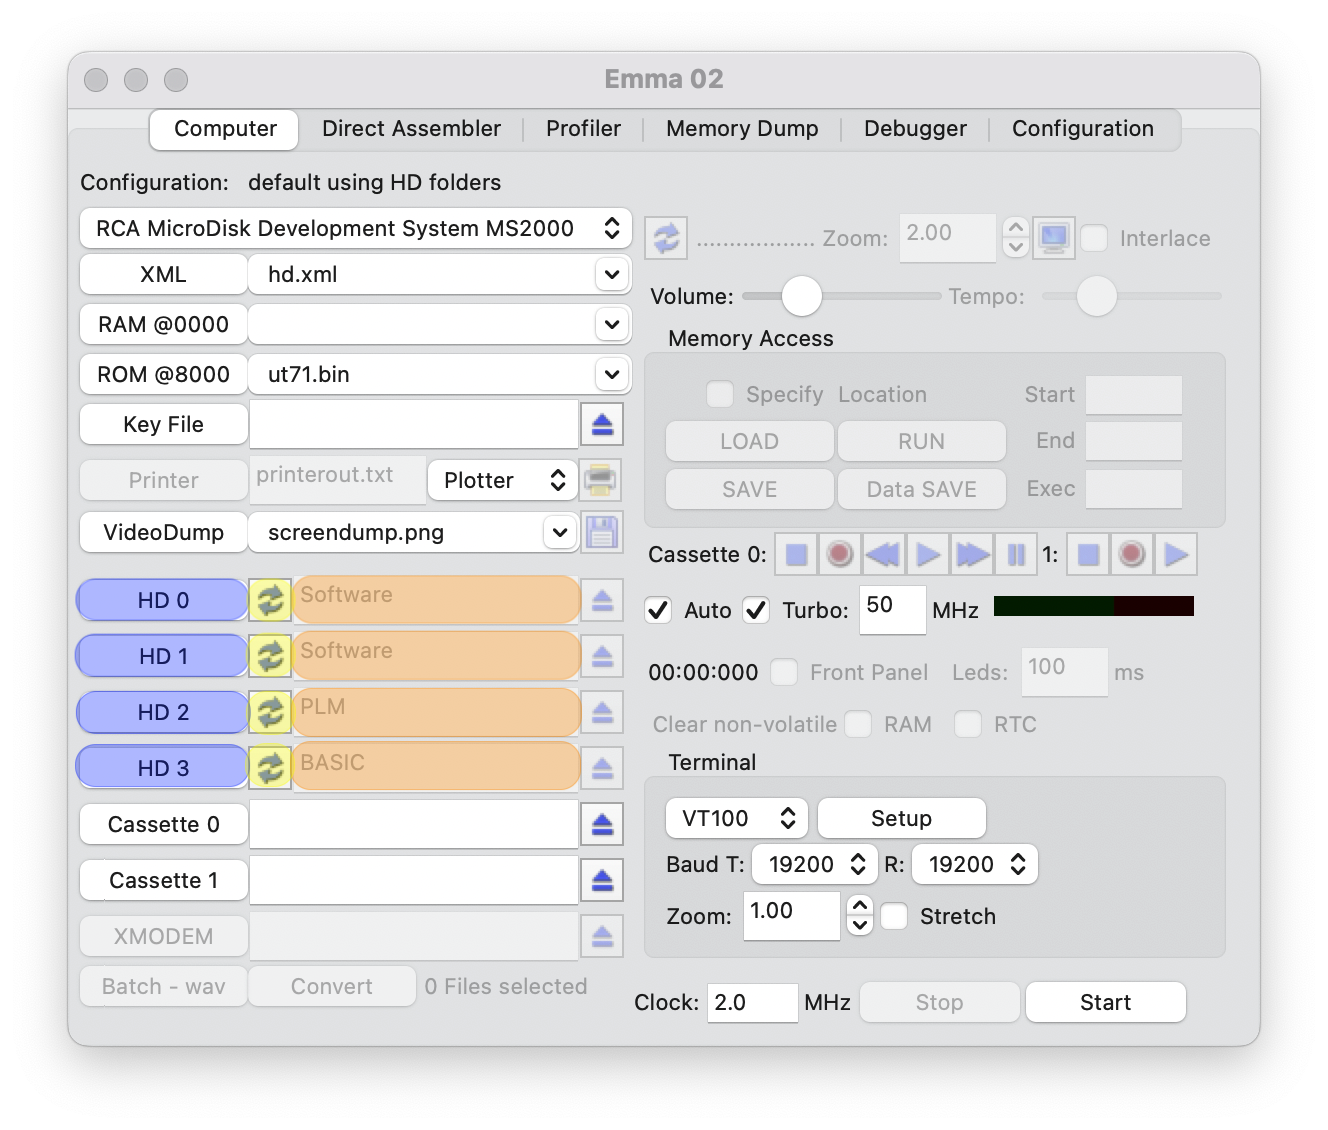
The HD GUI is available for upd765 drives, instead of using a disk image it supports direct access to the PC hard disk. The actual HD directory can be specified by using the HD 0 to 3 buttons (highlighted in blue). The directory name will be displayed in the orange field.
To switch between HD and FDC mode press one of the double 'arrow' buttons (highlighted in yellow) .
Using the HD feature allows for a simple import/export from/to the PC file system. Next to that there is no disk size limit (310 KB for FDC images). In theory there is no limit of the total size of the directory however the following limitations still exist:
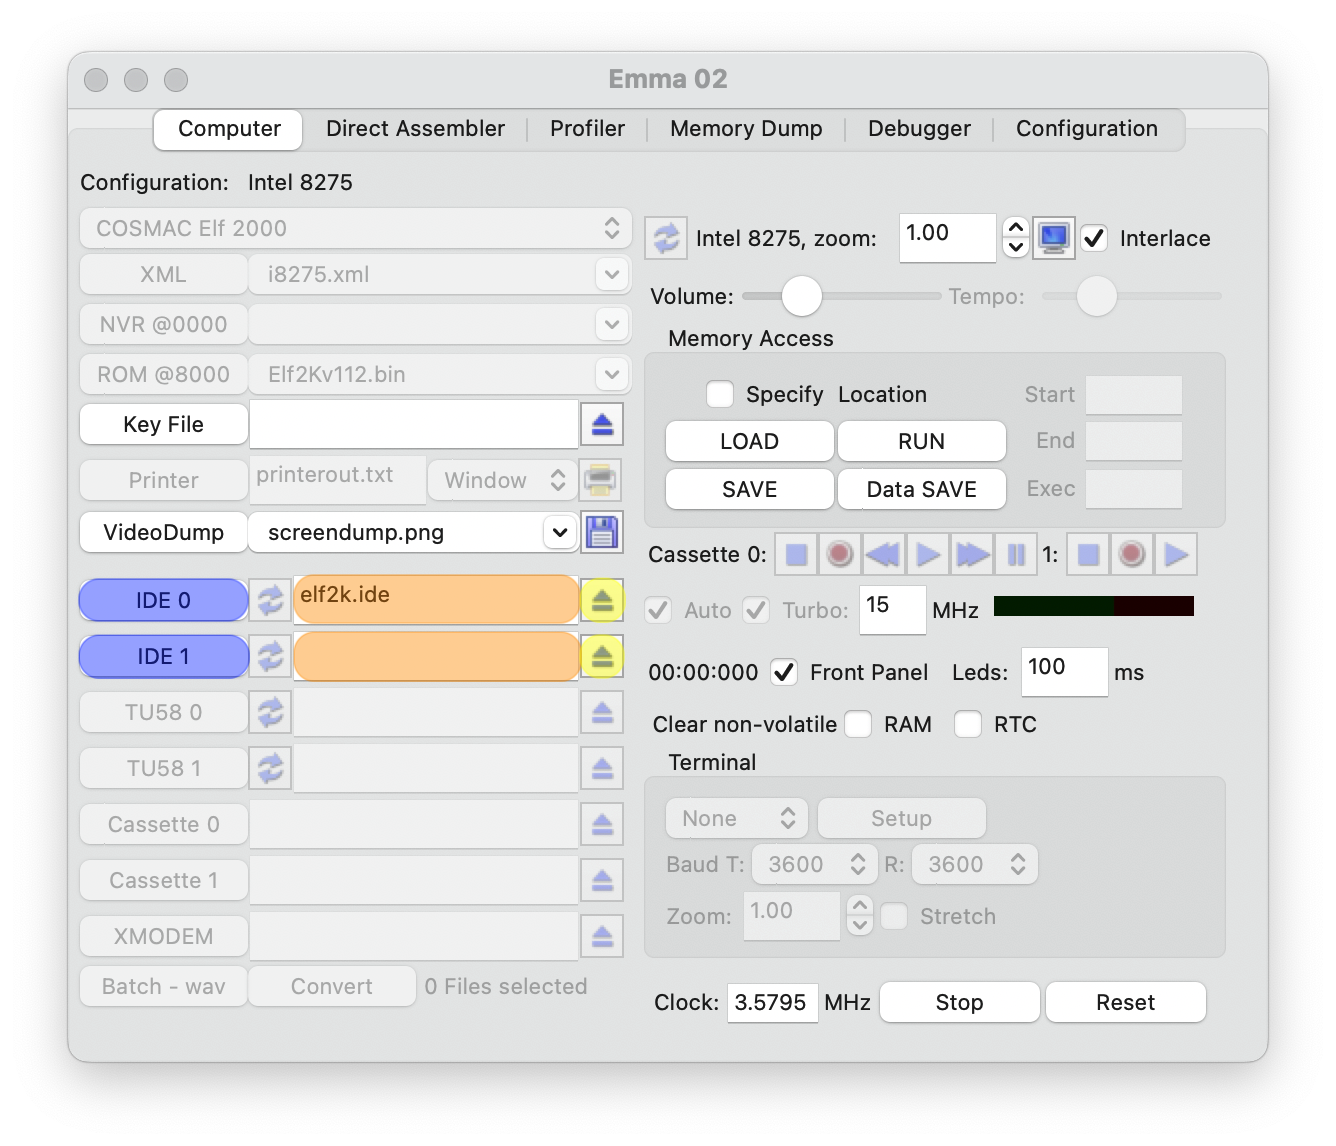
2 IDE drives (0 and 1) can be defined. In the example above a COSMAC Elf 2000 is configured. To change a disk at run time select a different filename by using one of the IDE x buttons (highlighted in blue) or type a name in the text field (highlighted in orange). To eject the disk use the eject button (highlighted in yellow) or remove the filename in the text field.
After initial start-up any file <type>-installation.ide (or <type>-installation.dsk) will be renamed to <type>.ide (or <type>.dsk) if that file doesn't exist.
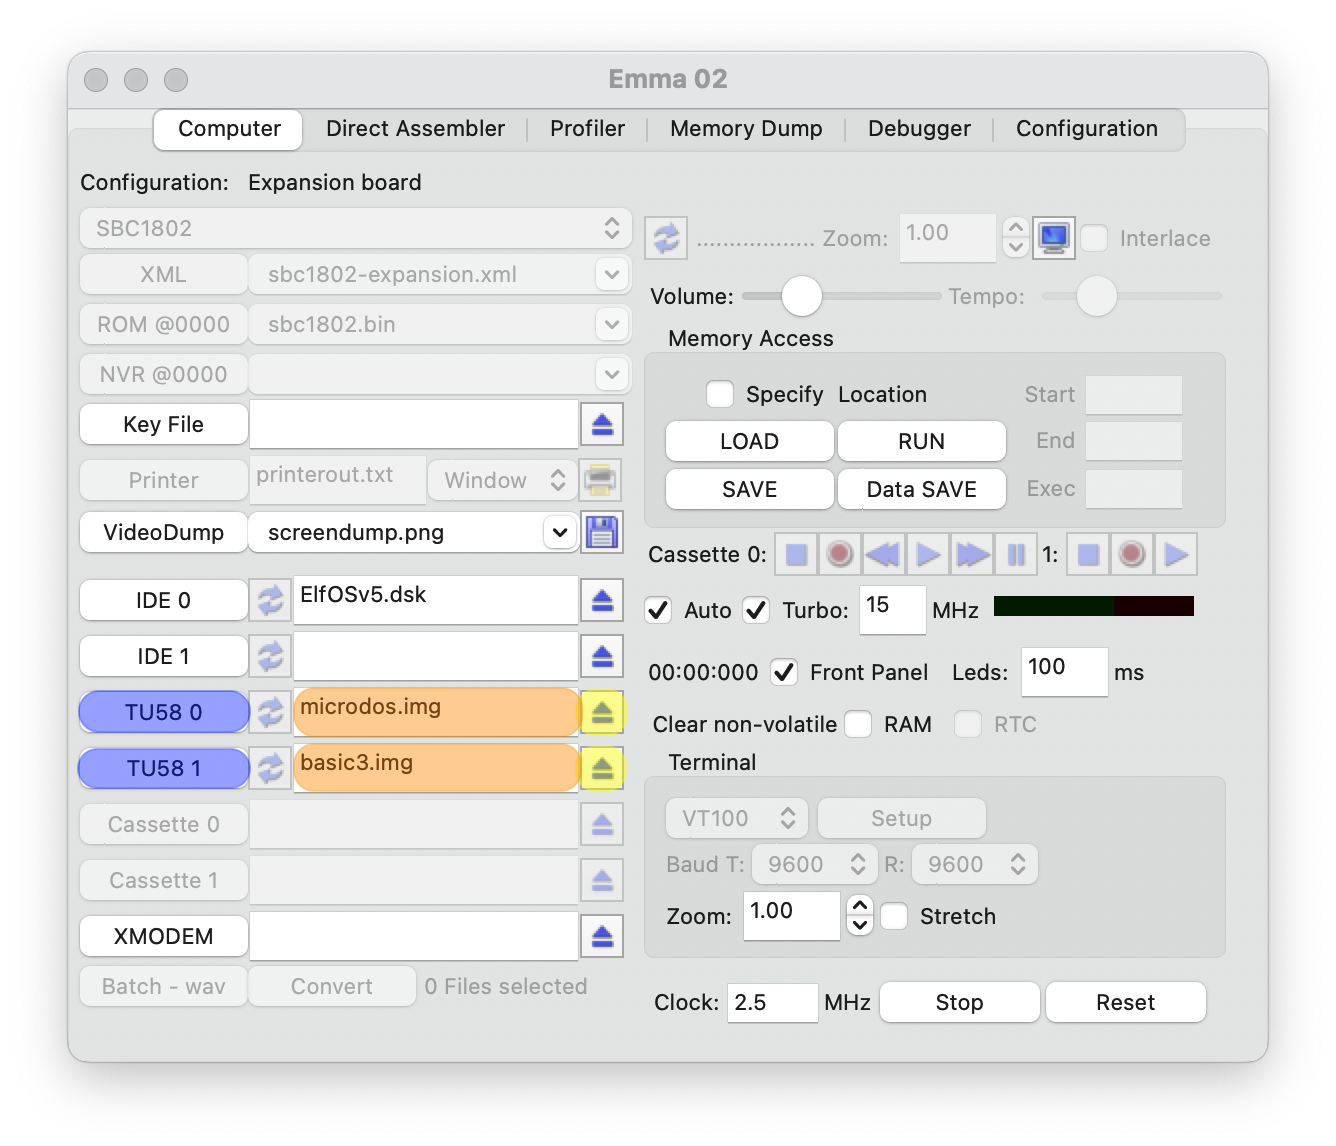
2 TU58 drives (0 and 1) can be defined. In the example above a SBC1802 is configured. To change a disk at run time select a different filename by using one of the TU58 x buttons (highlighted in blue) or type a name in the text field (highlighted in orange). To eject the disk use the eject button (highlighted in yellow) or remove the filename in the text field.