HEX or XMODEM file transfer will be activated if the selected XML file includes a HEX or XMODEM defintion.
A HEX file can be loaded in configurations like an Elf 2000 (when using a terminal), CDP18S020 Evaluation Kit Emulator, Membership Card and VIP2K Membership Card.
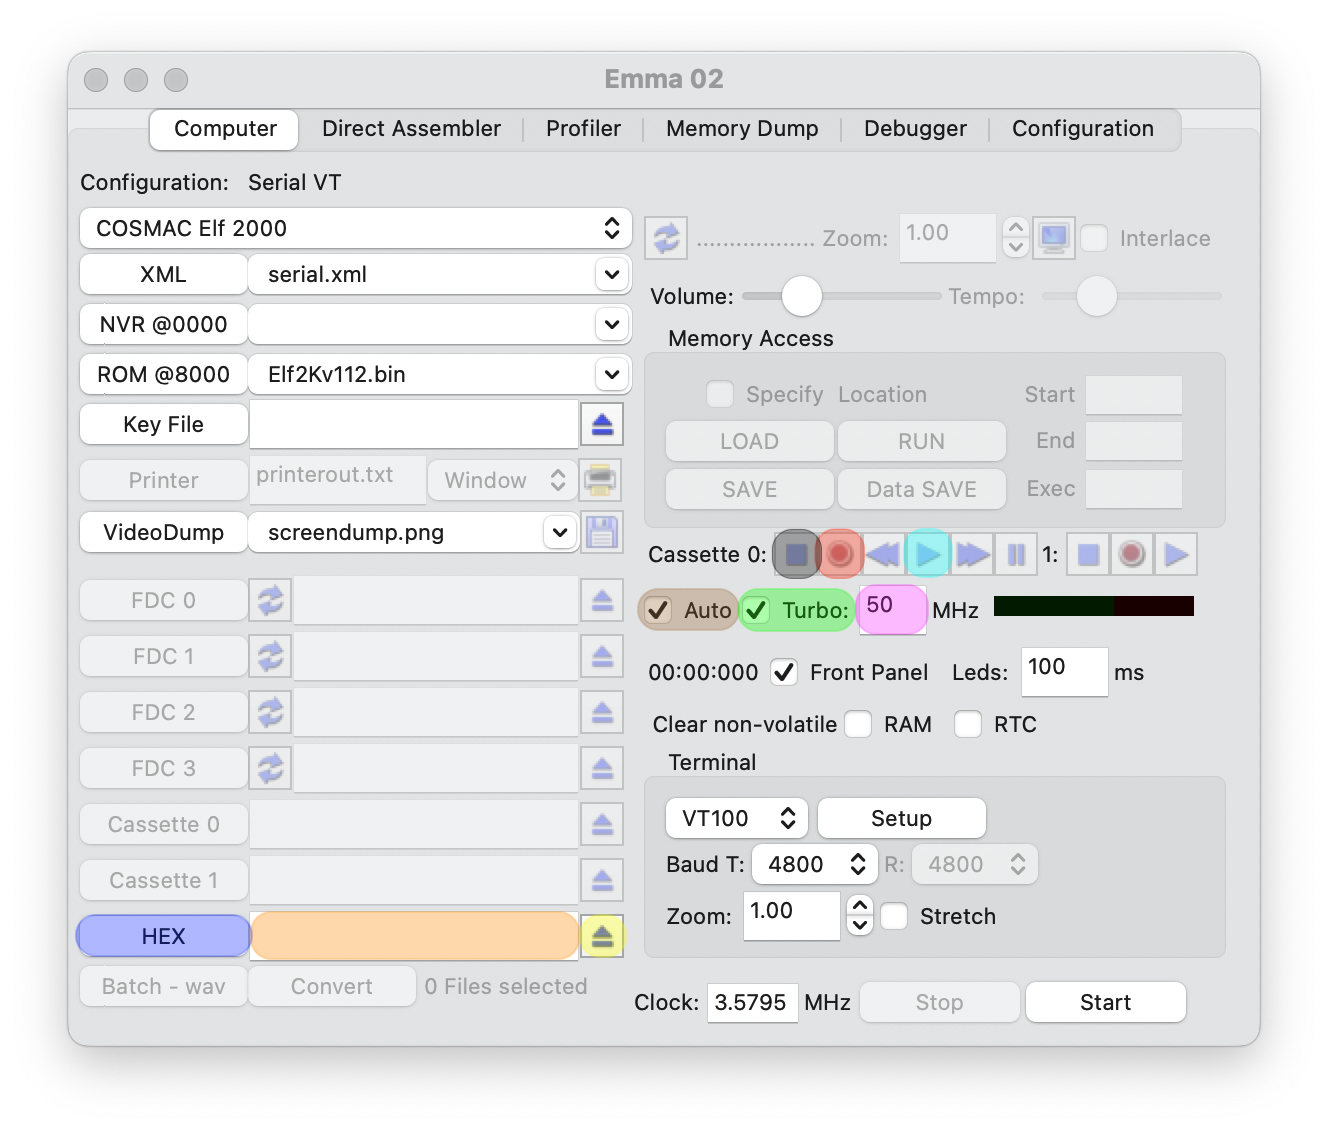
Before any file transfer select the file in the file selector window by pressing the HEX button (highlighted in blue). The selected file will be shown in the HEX text field (highlighted in orange), to clear this field press the eject button (highlighted in yellow).
Default and simplest method to transfer files over the HEX MODEM is 'Auto file transfer', activated by 'Auto' (highlighted in brown). Fastest option is also activating 'Turbo' (highlighted in green). Depending on which type you choose please follow the applicable instructions below.
To transfer HEX files to the Elf 2000 emulator make sure to unselect the 'Auto' (highlighted in brown) option.
The Elf 2000 monitor should be running and showing the >>> prompt. After a file is selected press play (highlighted in green). The HEX data should show on the Elf 2000 terminal screen. When ready the last line will show: >>>:00000001FF press return and EOF shows on the terminal indicating end of file. The stop botton (highlighted in grey) will stop the transfer.
To transfer HEX files to the CDP18S020 emulator make sure to unselect the 'Auto' (highlighted in brown) option.
The UT4 monitor should be running and showing the * prompt. After a file is selected type !M and then press play (highlighted in green). For saving RAM to a file type ?M<start> <length> where <start> is the starting address and <length> the number of bytes to be saved. Then press record (highlighted in red) and press 'return' in UT4. The stop botton (highlighted in grey) will stop the transfer.
This option can be used in combination with the monitor software.
The Membership Card montior should be running and showing the > prompt.
To load: after a file is selected, start the load command by pressing 'L' or 'I'.
To save: after a file is selected, start the save command by pressing 'S' or 'C'. For the Membership Card: when the save is finished the front panel LEDs should flash on/off, at that time press a key in the video terminal window.
For both save and load make sure a file is selected (highlighted in orange) before using the save and load instructions otherwise the emulated computer will hang on the load (until you manually start a file) or with a save the terminal output will not be written to any file.
To use this make sure 'Auto' is NOT checked (highlighted in yellow). This setting is more like the terminal LOAD/SAVE handling with the real monitor.
To save: after a file is selected, start the load command by pressing 'L' or 'I'. When the terminal states 'Ready to LOAD Program' press the 'play' button (highlighted in cyan).
To save: after a file is selected, start the save command by pressing 'S' or 'C'. When the terminal states 'Ready to SAVE Program' then press the 'record' button (highlighted in red). For the Membership Card: when the save is finished the front panel LEDs should flash on / off, at that time press a key in the video terminal window.
When the 'Turbo' option (highlighted in green) is selected the emulator will increase the CPU speed speed during file transfer to allow faster file transfer in the emulator.
The speed of the Turbo mode can be changed (highlighted in purple); default is 15 MHz (highlighted in purple), which works well on my Mac Studio (running 3.2 GHz, 20 CPU/48 GCPU, Apple M1 Ultra) as well as previous Mac pro (running a 3.5 GHz, 6-Core, Intel Xeon E5). On the Mac Studio Emma 02 still works well when using 50 MHz. For an older or slower computer, especially when having one core, consider using a lower value. Too high values will not run on slower PCs as all CPU power will be used by the emulator.

Before any file transfer select the file in the file selector window by pressing the XMODEM button (highlighted in blue). The selected file will be shown in the XMODEM text field (highlighted in orange), to clear this field press the eject button (highlighted in yellow).
Default and simplest method to transfer files over the XMODEM is 'Auto file transfer', activated by 'Auto' (highlighted in brown). Fastest option is also activating 'Turbo' (highlighted in green). Depending on which type you choose please follow the applicable instructions below.
Default settings, to use this make sure 'Auto' (highlighted in brown) is checked. The automatic mode will work with the Elf/OS commands xr, xrb, xs, xsb, yr and ys. After a file is selected give the xr, xrb, xs, xsb, yr or ys command in Elf/OS.
For xr, xrb, xs, xsb file transfers only one file will be used, if multiple files were selected only the first will be used.
For the yr command it is possible to use multiple files (which can be selected in the file selector window). Emma 02 will also send the filenames to Elf/OS.
For the ys command the filename specified is NOT used, instead the file names specified in Elf/Os will be used and resulting files will be stored in the folder selected via XMODEM.
If no file is specified before starting the file transfer Elf/Os will wait for the transfer to start. If this happens unselect the auto checkbox (highlighted in brown) and try a manual transfer.
To use this make sure 'Auto' (highlighted in brown) is NOT checked. After a file is selected start the file transfer command in Elf/OS. Then press play (highlighted in cyan) for transferring to Elf/OS and press record (highlighted in red) for transferring from Elf/OS. The stop botton (highlighted in grey) will stop the transfer.
When the 'Turbo' option (highlighted in green) is selected the emulator will increase the CPU speed speed during file transfer to allow faster file transfer in the emulator.
The speed of the Turbo mode can be changed (highlighted in purple); default is 15 MHz (highlighted in purple), which works well on my Mac Studio (running 3.2 GHz, 20 CPU/48 GCPU, Apple M1 Ultra) as well as previous Mac pro (running a 3.5 GHz, 6-Core, Intel Xeon E5). On the Mac Studio Emma 02 still works well when using 50 MHz. For an older or slower computer, especially when having one core, consider using a lower value. Too high values will not run on slower PCs as all CPU power will be used by the emulator.
Via the VT Setup button (highlighted in asparagus green) it is possible to change the Packet Size used for the YMODEM receive function (used in the yr command). Default this is set to auto but is changeable to 1024 or 128. When auto is used Emma 02 will send in packets of 1024 bytes if data is available to fill that, if less data is available 128 will be used.
For details see section: Terminal Setup.