Elf Os is a disk based operating system for Elf class computers designed by Mike Riley, for additional information see also: Elf/1802 Emulation.
During installation the following .ide files are already installed including Elf/Os 2.8:
The following example will install Elf/Os 2.8 via a vt100 terminal. To change video output after installation follow the procedure Installation Biosio afterwards.
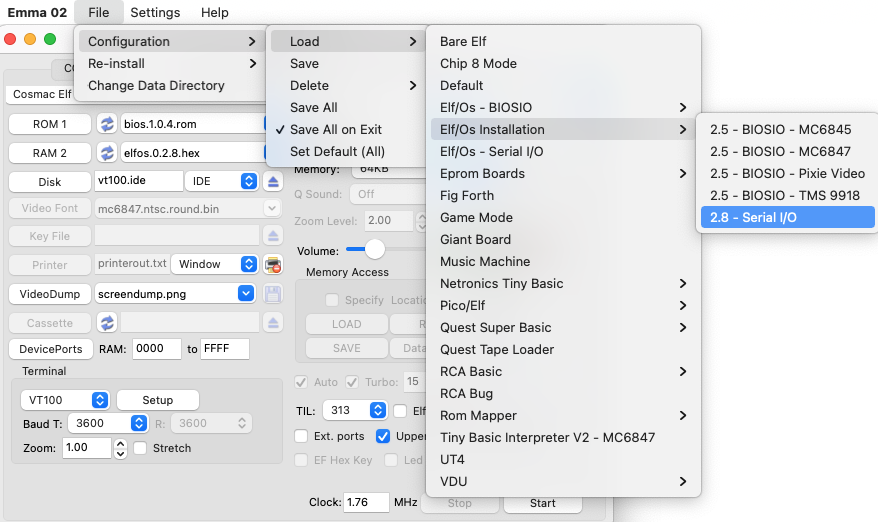
To start installation, first load the configuration with the menu option below (blue square) following the grey menu:
This should define:
ROM 1: bios.1.0.4.rom
RAM 2: elfos.0.2.8.hex
IDE: (any filename).ide
Disk Type: IDE; with 512 Tracks, 4 Heads and 26 Sectors
Boot address: 9000
RAM: 0 to FFFF
Vt100: selected
Uppercase: selected
To start installation of Elf/Os follow these steps:
This should start one of the Elf computer windows and a Vt100 window, press the return button in the Vt100 window which will set the baud rate and should after this show this menu:
   Elf/Os Installation
   1> Run hard drive init tool
   2> Run filesystem gen tool
   3> Run sys tool
   4> Install binaries
   5> Boot Elf/OS

      Option ?
Choose Q for Quick format, which will initialize the hard drive. When the init is complete, you should see something similar to:
   Total Sectors: 53248
   Format Complete
After this the menu will be redrawn.
Note: This step only needs to be performed once. If you have already run the hard drive init tool on your emulated drives, you will never need to run it again.
This will setup the filesystem on the disk. After running this step you should see something similar to:
  IDE File System Gen Utility

  Total Sectors: 53248
  AU Size: 8
  Total AUs: 6656
  Master Dir Sector: 48
  Filesystem generation complete
After which you again get the installation menu.
Note: This step you also normally need to run only once. You would only need to run this option again if you desire to wipe out the contents of your drive.
This will copy the OS kernel to the hard disk. You should see:
System copied.
This will install the binary utilities onto the disk.
DIR - allows you to view the disk directory
SAVE - Save memory contents to executable file
DUMP - allows you to dump memory contents to executable files
MINIMON - a simple monitor program that you can use to view/modify memory
LOAD - loads an executable program into memory without executing it
FREE - shows you disk usage statistics
DEL - allows you to delete files
HEXDUMP - displays the contents of a file in hex
COPY - allows you to copy files
RENAME - allows you to rename files
TYPE - displays the contents of a ASCII file
EDIT - is a really simple text editor
EXEC - allows you to execute a program already in memory
RINSTALL - allows you to load additional packages
MKDIR - Make a directory
RMDIR - Remove a directory
CHDIR - Change/View current directory
PATCH - Applies program patches
VER - Get the version of Elf/OS
ASM - Assembler
STAT - View file statistics
SEDIT
This will boot Elf/Os and then you should see:
Elf/OS Ready
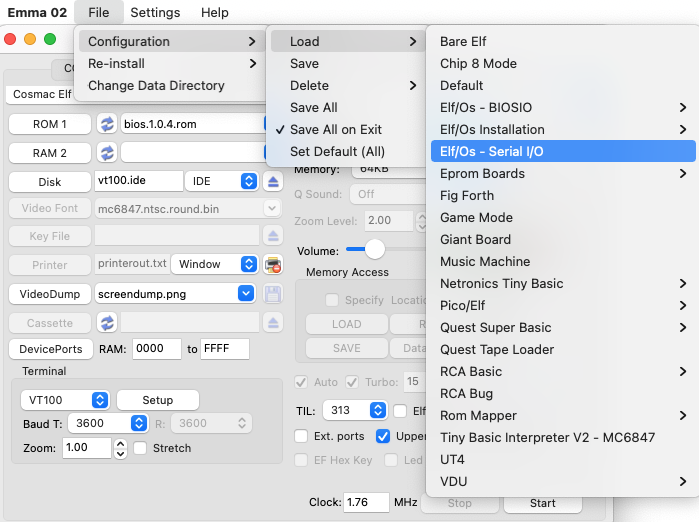
From this time on you can start Elf/Os directly by loading the configuration with the menu option below (blue square) following the grey menu:
Or alternatively by changing the following setting in the Emma 02 window:
RAM 2: <empty>
Boot address: FF00
Instead of using the combined bios and biosio rom file supplied with the Emma 02 emulator you can also load separate rom files for the bios and biosio as ROM 1 and 2.